Chromebooks and iPads come with a built-in webcam that your students may or may not have discovered and tried out some selfies. There are more useful and educational ways to incorporate it in the classroom, some of which our awesome teachers are already using. Try out some of these ideas:
The webcam doesn’t have to be your webcam. There are lots of webcams around the internet that record footage that can be used and discussed in your classroom! Just imagine a lesson where students observe clownfish and document their symbiotic relationship with anemones.
If you need more ideas or need help getting started, contact your librarian!
Podcasts have been mentioned a few times recently. Classes at both the middle and high school have incorporated podcasts into lessons and projects. In order to utilize them effectively (or at all), it is important to understand what they are and how we can use them with our students.
Podcasts are audio stories created to share ideas, presentations, or music. They originated alongside traditional blogging, so podcasts are sometimes referred to as “audioblogging.” In general, one creates a podcast by recording audio, editing it, and distributing it online. These audio files can then be downloaded or streamed by an audience.
Why podcast? (These are just some of the benefits.)
It allows for another level of communication between students and teachers
Sometimes students are more expressive when speaking than writing
Adding audio to your instruction meets the needs of more learning styles
How are podcasts different?
Podcasts are different than screencasts and videos because it is JUST AUDIO; screencasts and videos include audio AND visual.
How do podcasts get made?
There are many web tools for recording and sharing audio. Click here for an extensive list of options, which can be organized by device and cost. This spring, some teachers have been using SoundCloud to facilitate projects involving podcasts. The benefits of this particular service are:
Sure! Over the past few days, the 12th grade English classes have been working on podcasts as a final assessment for Jonathan Swift’s A Modest Proposal. Their task was to prove the existence of a theme of their choice within the essay; they needed textual evidence and modern parallels. The final product was a podcast, some examples of which are below.
I am really impressed with the level of analysis and creativity that my students put into their podcasts. Their final products showed how well they worked in a collaborative environment, and they were able to talk about their ideas and develop them in a way that showed they were synthesizing the information and relating it to modern day ideas. More importantly, they are now able to extend their learning and listen to other podcasts and consider their peer's viewpoints. --Mrs. Megan Seymore
What I like best about this is that by giving students choices and making it real-world, I saw very high levels of student engagement, especially among students who haven't always been engaged. --Mrs. Krysta Travelpiece
If you would like to integrate podcasts into your classroom, just contact your building librarian!
Google Slides is sometimes called the Google version of Powerpoint, but if you have used both these tools in the classroom, you know that while the basic idea may be the same, their overall uses are drastically different.
Microsoft Powerpoint
Google Slides
Allows for creation of a slideshow presentation with transitions, sounds, animations, etc.
Allows for insertion of sounds, video, hyperlinks and autoplay
Only available to create with a PC running Microsoft Office
Has a more robust set of options for advanced users
When work collaboratively, only the original can be created on ONE computer at a time
Allows for creation of a slideshow presentation with transitions, animations, videos, autoplay, etc.
Can be shared via a link
Saves changes automatically
Can be worked on collaboratively by several teachers or students
Allows for viewing and conversion of Powerpoints to Google Slides (but this can be a nightmare! - it’s not a perfect conversion)
While we do not want to re-create the wheel, it can be frustrating to spend the time converting old Powerpoints to Google Slides, only to have to fix every slide. Consider other options, such as pre-made game templates - I like this Jeopardy one, to save you time.
Google Slides can also be used in several collaborative ways that Powerpoint cannot. Encourage your students to use Google Slides to show what they have learned, but also along with another web 2.0 tool, such as Movenote.
Still struggling for ideas? Consider these:
Use Google Slides as a review for an upcoming quiz or test
Have students create a comic strip to review a concept
Link to a Google Form at the end of a slideshow to check for understanding
Let students go through the slideshow individually on a device and insert a YouTube video directly into the slideshow for students to watch and reflect on what they learned
Google Hangouts functions like chat (think instant messenger) and video chat (like Skype or FaceTime). You can use it on ANY device - desktop, laptop, tablet, phone. Not only can this web tool make your life easier, you can use it in your classroom with your students and colleagues as well.
MAKE LIFE EASIER
Everyone likes when products make life easier, right? I mean, I do. Google Hangouts is one my favorite tools for communication and collaboration.
Contact colleagues without sending yet another email. This comes in handy for quick questions, tracking down a student, or making decisions, among other things.
Join a meeting virtually that you’re unable to attend in person. You can do this via the chat feature OR the video call feature.
Group conversations more efficiently. Think about clubs/groups co-advisors, school or district teams; students can also use it for group work in and outside of school
USE IN THE CLASSROOM
Beyond making lives easier, Google Hangouts is an incredible tool to use in the classroom as well. Think student collaboration, guest speakers, virtual field trips… the list goes on!
A learning management system (LMS) is an online application for the administration, documentation, tracking, reporting and delivery of electronic educational technology. Basically, it’s a way to stay organized when using the internet for your classroom.
At Warrior Run in the Middle and High School levels, we started the year with a subscription to Hapara, which I have heard some call, “Google on steroids.” In the 1:1 device classroom, it offers the teacher many advantages for keeping resources organized, keeping kids on task and disseminating information to students. If you are just starting out, the most helpful parts to try out include:
When you first start out, you can use the icons at the top right to share. This will bring up the “Smart Share” screen, where you will choose the document you want to share, how you want it shared (copy for each student, read only, comment only, or editing ability), and to whom you want to share it (entire classes, individual students or groups). When you do this, it puts in their folder for your class in Google Drive. It can take some time for it to share all and a progress bar will show at the bottom of your screen. Do not exit the dashboard until all files are shared.
Open Tabs for Students
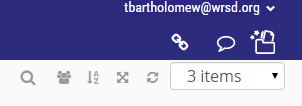
Whether you want to quickly recommend a site to a student doing research or you want to open the same site for all students to save them time from typing in the URL, this is a very useful feature. Either press the link icon in the blue bar to do it for all, or use the individual one next to a student’s name. Kids will be impressed by your “magical powers” and it will save precious class time.
Send messages to students
Keep students on task, remind them of what was stated in the instructions or redirect them when they start to lose attention. This saves face for the student but also differentiates and keeps them focused.
If you have any more questions about Hapara, check out our slideshow or see your librarian!
A screencast is a digital recording of computer screen output, also known as a video screen capture, and often contains audio narration. These tools have been around for a little while; maybe you've heard of Screencastify or Screencast-O-Matic. We use them sometimes to create video tutorials for students and teachers - you can find several on the WRSD Libraries YouTube channel.
MoveNoteis a newer app (also a Chrome extension and a website), and is a bit different than the others. It allows you to upload a “slide deck.” (A slide deck is a generic term for a group of slides, or the pieces of a PowerPoint or Google Slides presentation, or even a series of images or photos.). Once you upload the slide deck, you can rearrange the pieces if necessary, and then record yourself narrating it. With MoveNote’s latest update, you are able to choose (or not choose) to record yourself as you narrate.
to create tutorials for or share information with students or other teachers
as part of an assignment (for example, instead of presenting in front of the class, students can create a MoveNote to be viewed by small groups of students)
As a Student
to submit work when absent
to share a presentation or information with a teacher
as part of an assignment
An additional benefit of using MoveNote is that it offers a single sign on! This means you can use your existing Google credentials, without having to create yet another account.
Teachers and students have started using this tool in recent weeks and are experiencing success.
Matt Hill used it for his graduate course, to present a research study.
Trish Berry is using it for her Reading class, creating targeted audio books for students.