A learning management system (LMS) is an online application for the administration, documentation, tracking, reporting and delivery of electronic educational technology. Basically, it’s a way to stay organized when using the internet for your classroom.
 At Warrior Run in the Middle and High School levels, we started the year with a subscription to Hapara, which I have heard some call, “Google on steroids.” In the 1:1 device classroom, it offers the teacher many advantages for keeping resources organized, keeping kids on task and disseminating information to students. If you are just starting out, the most helpful parts to try out include:
Smart Share
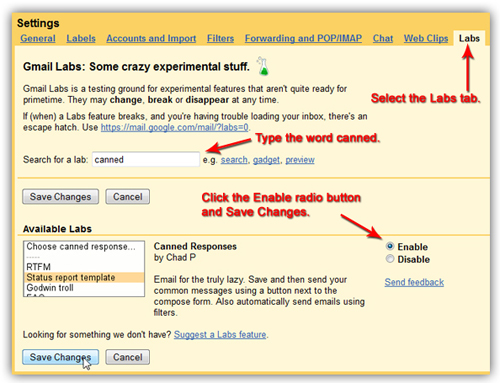
 When you first start out, you can use the icons at the top right to share. This will bring up the “Smart Share” screen, where you will choose the document you want to share, how you want it shared (copy for each student, read only, comment only, or editing ability), and to whom you want to share it (entire classes, individual students or groups). When you do this, it puts in their folder for your class in Google Drive. It can take some time for it to share all and a progress bar will show at the bottom of your screen. Do not exit the dashboard until all files are shared.
Open Tabs for Students
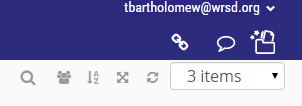
Whether you want to quickly recommend a site to a student doing research or you want to open the same site for all students to save them time from typing in the URL, this is a very useful feature. Either press the link icon in the blue bar to do it for all, or use the individual one next to a student’s name. Kids will be impressed by your “magical powers” and it will save precious class time.
Send messages to students
Keep students on task, remind them of what was stated in the instructions or redirect them when they start to lose attention. This saves face for the student but also differentiates and keeps them focused.
If you have any more questions about Hapara, check out our slideshow or see your librarian!