Friday, February 24, 2017

Green Screen

If you've ever watched the weather segment on your local news, you've experienced green screen technology.  While it isn't exactly brand new, it is still exciting!  

What is green screening exactly?
It is a video technique that utilizes a green background in front of which moving subjects (like students!) are filmed and which allows a separately filmed background to be added to the final image.

What equipment does it involve?

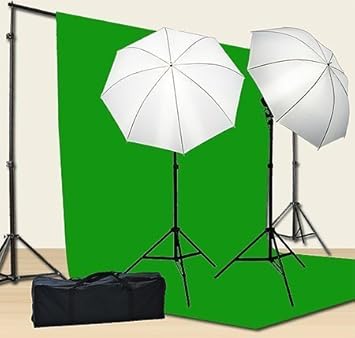
  • Green background - in the HS and MS libraries, we have green screen kits that look like the picture below
  • Green screen app - we have an app called DoInk on our iPads for students to create images and videos using different backgrounds
Image result for chromakey green screen kit


How can we use it?
Honestly, the possibilities are endless!  To give you a few starters,
  • Mrs. Travelpiece's 9th grade English students have filmed a few green screen pieces to use within their book trailer videos.
  • 5th grade science students learned about volcanoes with Mrs. Kramer and Ms. McCormick.  One of the options for the summative assessment was to "report live" from an erupting volcano.  So their background was a volcano, then they filmed themselves giving a news report.  Here is an example:


Why should we do green screen projects?
Projects like this lend themselves well to alternative assessments and creative project-based learning.  Students will learn to plan for multimedia pieces, like a story board.  They would possibly need to write scripts, collect props, find images or videos for their background.  Students acquire knowledge in lessons, then apply it in this sort of project.  Secondary skills are developed as students work with classroom content.

Do green screen videos need people as subjects?
No!  Many green screen projects involve inanimate objects, animation, and stop-motion animation.  So many options!

This sounds cool!  How do I get started?


Thursday, February 16, 2017

PETE&C Takeaways

Earlier this week, I accompanied a few colleagues to the annual Pennsylvania Educational Technology Expo and Conference (PETE&C) in Hershey, PA.  This is a wonderful (but very crowded) conference organized by PAECT every year.  When thinking about what I want to share out from this opportunity, here are my top takeaways that I hope you can start conversations around:


  1. Seesaw is the go-to platform for digital portfolios in the elementary school setting.  Check out the slideshow by the presenters.
  2. Aurasma is changing the way we interact with our reality, allowing opportunities to scan and see augmented versions of reality.  Some schools use it to give tours of their schools or for seniors to be a visible part of their yearbook.  Matt Hill had the great idea to do this with our Hall of Fame!
  3. The new ISTE standards released last summer highlight so many opportunities for student engagement and active learning.
  4. Vibby allows you to take a video from the internet and crop it so you are only showing your audience the part that you want them to see.
  5. PHeT contains a wide variety of online interactive science activities.
  6. It’s possible for a teacher to learn alongside a student in a content area that they are interested in but not an expert.
  7. It’s important to give students a voice in the changes at their school.
  8. Learning is more powerful when it is directed by the students, such as the example of a session about Breakout boxes conducted by students at a professional conference!
  9. You can do digital Breakout boxes (if you solve the Poe-ch the Raven one, give me and Liz the answer!).
  10. Digital portfolios don’t need to be fancy.  Google sites is the perfect option for students to collect their learning for Google schools.

If you want to see our notes, they can be found here. I hope this will inspire someone to check out something new or start a conversation about innovation for your classroom.  Speaking of innovation, there’s a new WR Twitter account - @wrsdinnovate.  Give it a follow.


Wednesday, February 8, 2017

Formative Assessment Tools Online


We’ve all had those moments in the classroom when we think the students understand, but as it turns out, most really don’t.  As teachers, we feel frustrated.  Students probably even more so.  We can avoid lengthy reteaching lessons by conducting quick formative assessments.  We can move beyond the exit tickets and the “show of hands” scenarios with some incredible online tools.  There are so many great tools out there, so here are just a few.


Formative lets teachers create digital assignments for free.  After assignment is created, students access by a “quick code” or a unique URL.  Syncs with Google Classroom!  Teachers see responses in real time.  Includes a “show your work” option, which lets students create freehand answers -- they can draw what they learned or show their work on a math problem!  Use your existing Google account.
Socrative allows you to instantly connect with students as learning happens.  The free app allows you to quickly assess students with prepared activities or on-the-fly questions to get immediate insight into student understanding.  Students access your activities by entering your Socrative classroom name.  Use your existing Google account.

Kahoot is a popular class quiz game that students and teachers enjoy.  Students access your quizzes by entering a unique code; they can also make their own to share with the class.  Teacher shows questions via projector; students see answers on their devices.  Inspiring ways to Kahoot!

Spiral transforms any classroom into a live learning space.  Activities include “Quickfire” formative assessments, “Team Up” collaborations, “Discuss” interactive presentations, and “Clip” video quizzes.  Syncs with Google apps!  Use your existing Google account.


As I said, there are a ton of web tools.  Here are some more awesome lists:

How are you using formative assessments in your classroom? Tell us in the comments!