Showing posts with label project-based learning. Show all posts

Wednesday, January 23, 2019

Another great Screencast tool

Happy January, everyone!  Hope you're surviving this week of crazy weather.

Greg recently shared the extension for Loom with me - another screencast creator similar to Screencastify.  You can sign in with Google and create recordings of your desktop or just one tab.  Of course, when you start out, you have to give it all the permissions (to add the extension to chrome, to access your Google account, to use the microphone and camera).  Then it will come up with this screen:


To get started, you have to hit the Loom icon in your Google extension toolbar.


Then it will ask you some options.


Including whether or not you got a haircut recently!  (I did, thanks for noticing!)

After that, this is what a recording might look like.  Please note that you can pause your video while you are recording, which is a feature that does not exist in some other screencast creators.  Then the finished screen will take you here.


From here, you can see lots of options, such as sharing and editing the video.  If you invite people via Gmail to view the video, it will also tell you when they have done so.  This is a feature that Screencastify does not have.

Some ideas that this could be used for include creating an instructional video for students to watch at an independent station, having a substitute teacher share this video with your students on a day that you are absent, and having students create a reflection on a topic that they just learned and then share it to your email.  They could reflect on a finished project, a story that was just read to them, or goals that they set for themselves in a class.

Let me know your thoughts on this tool and how you are able to make it work for you!

Friday, October 20, 2017

Learning Techniques and Tech Tools to Make Them Happen

Recently I was listening to the Cult of Pedagogy Podcast and heard about the research of some cognitive psychologists on learning strategies.  In it, they talk about six learning strategies that help us develop our study skills.  I thought I would share this with you and also include some tools for making that happen in a technology rich environment.

First off, you can read the actual article here.  In it, the learning strategies are:

  1. Spaced Practice
  2. Retrieval Practice
  3. Elaboration
  4. Interleaving
  5. Concrete Examples
  6. Dual Coding

Many of the learning strategies we were taught growing up fall into one of these categories.  I do not write this blog post to talk about flashcards, but rather how a chromebook or mobile device can be used in the same way.

Spaced Practice is the same as chunking, and teachers structure their lessons so that they are introducing a small amount of new information and reviewing old information already.  With the use of Google Calendar and turning on alerts, we can show students how to remind themselves to work on a larger project a little bit at a time, such as essay writing and revising.  There are also student planners for chromebooks, such as My Study Life and myHomework.  Just a reminder that anything requiring an account may have restrictions for students under the age of 13 without parental permission.

Retrieval practice forces us to put away anything that might trigger a memory that might make us feel that we know or understand a concept, but without the trigger, we cannot recall the information.  The learning experts suggest writing or telling all the information on the topic so that you can see how much you can recall.  Then through this, any misconceptions can be corrected or you can make note of areas in which you could not recall enough.  

Chromebooks can be used to do this in a number of ways, from recording sound files of students talking about their knowledge, then a teacher can listen and give feedback, to a student taking a video of themselves talking and following the same procedure.  Sound recordings and video recordings can both be made directly on the chromebook, then saved to Google Drive, linked in Google Classroom, or sent via email to the teacher.  For sound recordings, I recommend Mic Note and for video recordings I recommend Soapbox.

For the elementary iPad setting, Educreations and Evernote are great options for this, but iOS 11 now has screen recording available, so students could actually be just using the camera and recording themselves with the camera facing them as they talk.

Elaboration goes hand-in-hand with questioning techniques and good class discussion, where the students are posing, answering, and facilitating discussion.  While face-to-face would always be preferable, it is possible to use discussion boards to work on this skill asynchronously and also have students provide evidence to support their claims.  Google Classroom and Schoology both work very well for this.  At the high school level, having students work towards providing citations to their discussion posts will prepare them for the requirements of higher education coursework.

Interleaving is mixing the repetition of a variety of skills so that students are forced to decide on the correct strategy to give the answer.  This is where project-based learning really shines because it is already mixing a variety of strategies and skills.  Writing, problem-solving, communicating, working well with others, planning a timeline are all elements we see in our projects.  Depending on the task, technology is usually a great tool for these ideas that we are already implementing in a great number of ways.

Concrete examples is something that teachers always do, but by having students come up with an example to explain an abstract idea of their own, it is more likely to stay with them.  It can be done in a number of ways.  The hardest part is not just drawing from a handful of students, so having every student contribute their concrete example to a Google Form or a discussion board can force them to create their own version that will stick with them as they learn because it can be personalized to their interests.  Exit tickets, Frayer models, and parking lots are other ways of having each student create their own.

Dual coding is my favorite because I am a visual learner.  To draw from what the authors said, it’s just combining the knowledge with a visual format:

“And when we say visuals,” Smith explains, “we don’t necessarily mean anything
specific, so it depends on the types of materials. You could have an infographic, a cartoon strip, a diagram, a graphic organizer, timeline, anything that makes sense to you so long as you’re sort of depicting the information both in a way with words and a way with pictures.”

“This isn’t just for students who are good at drawing,” Weinstein adds. “It’s not about the
quality of the drawing. It really just needs to be a visual representation as you can depict it.”

Another favorite for me is sketchnoting, and if you like Sylvia Duckworth, you know how effective mind mapping can be.  This is really powerful for students who like to doodle.  They will often come up with sketches so great that they are worth sharing with their classmates.

While this blog post has been long, I hope it has given you a variety of resources and ideas.  Please reach out if you have any questions and be sure to check out the websites of the Learning Scientists and Cult of Pedagogy.


Wednesday, April 12, 2017

Student Choice

Project-based learning (PBL)
          Alternative assessments
                              Personalized learning
                                        Flexible strategies

These words and phrases are everywhere.  They all directly relate to student choice.  As Joshua Block so eloquently puts it in his article:

Learning that incorporates student choice provides a pathway for students to fully, genuinely invest themselves in quality work that matters.  Participating in learning design allows students to make meaning of content on their own terms.

So... how do the phrases above relate to student choice, and what does that actually look like?

Here are some examples of what's happening at Warrior Run.  (Keep in mind, these are just a few examples - there are so many instances of student choice occurring every day!)

Students recently completed a persuasive research essay on a social topic (e.g. hunting, paying NCAA athletes, year-round school).  Through the research paper process, they honed their skills in research, writing, and crafting an argument.  They are now applying those skills as they turn their papers into public awareness projects. Students were given time to explore four different project options and choose their own direction.  It is now up to them to meet the basic requirements in a creative way.

As students learned about this period in literary history, they were given the opportunity to 1) become experts, and 2) help their classmates learn.  In small groups, students researched a Dark Romantic author, analyzed a short story by that author, created a lesson plan, and developed an interactive assessment.

Wrapping up the unit on poetry, students were asked to explore different types of hands-on poetry, including book spine poetry, blackout poetry, and others.  With very little direct instruction, students used their understanding of poetic rules and terms as they navigated in the uncharted territory of hands on poetry.  In the end, they created true poetic masterpieces.

Students are just beginning their final novel study in high school.  They will be given the option to work independently from start to finish.  Their goal is to complete checkpoints (i.e. quizzes and other assessments) along the way as they show their teacher their understanding of the novel.  The ultimate goal is proficiency or better.

From a long list of options, students chose a topic from Peruvian culture (e.g. food, clothing, customs, geography) and a corresponding language skill (i.e. reading, writing, speaking, listening).  In small groups, students researched that topic and developed a stand-alone lesson to go with it, including a formative assessment.  In the end, there were 16 stations throughout the school.  In their groups, the students visited each of the other stations to learn about that aspect of Peruvian culture, demonstrate their understanding, and receive a stamp for their visit.  

As I said earlier, these are just a few examples of student choice at the high school.  Do you have an example from your classroom?  Please share in the comments.

Wednesday, April 5, 2017

Nearpod and VR

As education moves towards a focus on authentic learning (thank goodness!), there is also a push to move beyond the classroom walls.  One way that teachers are doing this is through virtual reality.  Many teachers are already taking advantage of the virtual reality headsets available in the middle and high school libraries.  Our students have “left” the classroom to experience coral reefs, Mars, Versailles, Machu Picchu, and other places otherwise unavailable to us.


Nearpod is now offering this opportunity embedded into what is already an interactive lesson when using their software.  Teachers interested in using it, make sure you sign in with Google!  Their program, available across all devices, allows you to direct what is showing on the screen and collect formative assessments from students throughout the lesson.  One of these options can now be a 360 degree view of places around the world...and the universe!


Let’s try it out!  The lesson below is a ready-made virtual reality lesson from Nearpod which is free and it goes through different types of Native American Housing.  They recommend this lesson for grades 4-9, and students can work through it on a chromebook, with a mobile device, or with a VR headset (for the full immersion experience).


When you create your own lessons, you can choose to include a few VR experiences (known as a field trip) for your students in that lesson.  Or, you can choose from the pre-made lessons from Nearpod.  Many, but not all, are free.  They are all of a very high quality.


If you are interested in trying it out, make sure you redeem the free 6 month subscription to Nearpod Gold Edition by following these steps:
  1. Create an account (with GOOGLE!) if you have not already done so.
  2. Go to nearpod.com/redeem and enter the code PETE&C17.

That’s it!  See your building techspert or me if you have questions!

Friday, February 24, 2017

Green Screen

If you've ever watched the weather segment on your local news, you've experienced green screen technology.  While it isn't exactly brand new, it is still exciting!  

What is green screening exactly?
It is a video technique that utilizes a green background in front of which moving subjects (like students!) are filmed and which allows a separately filmed background to be added to the final image.

What equipment does it involve?

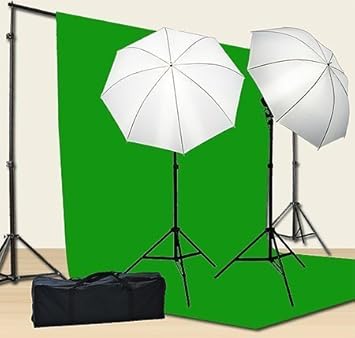
  • Green background - in the HS and MS libraries, we have green screen kits that look like the picture below
  • Green screen app - we have an app called DoInk on our iPads for students to create images and videos using different backgrounds
Image result for chromakey green screen kit


How can we use it?
Honestly, the possibilities are endless!  To give you a few starters,
  • Mrs. Travelpiece's 9th grade English students have filmed a few green screen pieces to use within their book trailer videos.
  • 5th grade science students learned about volcanoes with Mrs. Kramer and Ms. McCormick.  One of the options for the summative assessment was to "report live" from an erupting volcano.  So their background was a volcano, then they filmed themselves giving a news report.  Here is an example:


Why should we do green screen projects?
Projects like this lend themselves well to alternative assessments and creative project-based learning.  Students will learn to plan for multimedia pieces, like a story board.  They would possibly need to write scripts, collect props, find images or videos for their background.  Students acquire knowledge in lessons, then apply it in this sort of project.  Secondary skills are developed as students work with classroom content.

Do green screen videos need people as subjects?
No!  Many green screen projects involve inanimate objects, animation, and stop-motion animation.  So many options!

This sounds cool!  How do I get started?


Thursday, February 16, 2017

PETE&C Takeaways

Earlier this week, I accompanied a few colleagues to the annual Pennsylvania Educational Technology Expo and Conference (PETE&C) in Hershey, PA.  This is a wonderful (but very crowded) conference organized by PAECT every year.  When thinking about what I want to share out from this opportunity, here are my top takeaways that I hope you can start conversations around:


  1. Seesaw is the go-to platform for digital portfolios in the elementary school setting.  Check out the slideshow by the presenters.
  2. Aurasma is changing the way we interact with our reality, allowing opportunities to scan and see augmented versions of reality.  Some schools use it to give tours of their schools or for seniors to be a visible part of their yearbook.  Matt Hill had the great idea to do this with our Hall of Fame!
  3. The new ISTE standards released last summer highlight so many opportunities for student engagement and active learning.
  4. Vibby allows you to take a video from the internet and crop it so you are only showing your audience the part that you want them to see.
  5. PHeT contains a wide variety of online interactive science activities.
  6. It’s possible for a teacher to learn alongside a student in a content area that they are interested in but not an expert.
  7. It’s important to give students a voice in the changes at their school.
  8. Learning is more powerful when it is directed by the students, such as the example of a session about Breakout boxes conducted by students at a professional conference!
  9. You can do digital Breakout boxes (if you solve the Poe-ch the Raven one, give me and Liz the answer!).
  10. Digital portfolios don’t need to be fancy.  Google sites is the perfect option for students to collect their learning for Google schools.

If you want to see our notes, they can be found here. I hope this will inspire someone to check out something new or start a conversation about innovation for your classroom.  Speaking of innovation, there’s a new WR Twitter account - @wrsdinnovate.  Give it a follow.


Friday, January 27, 2017

Tech Tool Round-Up

This week, I just want to share some quick tech tools that sound amazing, are getting great reviews, but that I haven’t had a chance to check out fully with a class.  If you decide to use one, I’d love to hear about it!


This tool is a lot like Kahoot! and Socrative.  To create an account, go to Login and choose “Login with Google.”  You can create your own, use quizzes that have already been created, view reports of student answers, etc.  My favorite part is that you can create your own “correct” and “incorrect” memes to use in the game. View the video tutorial here.


If you were a fan of Zaption before it went away, you’ll love EDPuzzle.  You can choose a video for students to watch and have them answer questions.  Other options, though, are worth noting.  You can also talk over the video so you can explain it differently.  Maybe even personalize it for each class?  You can get data from the results of your video quiz to plan accordingly for the rest of your lesson.  It connects directly to your classes in Google Classroom and you can assign it to the whole class or just specific students.  When you first login, it gives a nice screen-by-screen tutorial, too. View a video tutorial here.


Buncee -
This one is great for the elementary level and students would even enjoy making their own.  This is a presentation creator, but it has much of its own content for dragging and dropping.  Students could create a story, share what they learned about a topic, or play a game.  There are great examples out there, so check it out. View the tutorial here.

If you’re not sure how to get started or need to brainstorm, contact your librarian!