Showing posts with label 1:1. Show all posts

Monday, March 25, 2019

Google Earth

Over the weekend, my son and I discovered that Google Earth has partnered with Carmen Sandiego, the old books, computer software and game show for kids from the 80s and 90s.

Image result for carmen sandiego
Credit Jason Scott, Flickr - https://www.flickr.com/photos/textfiles/40483310431

You can now use Google Earth to move about the world and chase down Carmen based on the clues given at different sites. 


It starts in London and then the game interviews locals and based on those clues, it asks where to go next.  For example, "She changed all her money to Yen."  That would lead us to choose Tokyo!


If you guess correctly, you might get a glimpse of Carmen Sandiego.  Once you have completed the game, you catch the Crown Jewels Caper.  This is a great, engaging way for students to practice geography skills.  It could be used as an extra time activity, like many of you do with Epic, Night Zookeeper, Prodigy, etc.


Other than this game, Google Earth also allows you to see 3D renderings of many famous places throughout the world.  You can also drop the person into any blue area and see the street view.  For example, I was able to see this "fuente" in Granada, Spain.


Beyond seeing what our house looks like, this allows students to gain that global perspective.  There are other activities built in too, including one with Jane Goodall.  This could be part of an extension activity on her research or a reading of one of the many books about her.


Check out what's new with Google Earth and see if it could enhance one of your lessons.


Wednesday, January 2, 2019

Google Cast for Education

If you are familiar with Apple TV or similar products (Amazon Fire TV stick, Roku streaming stick, Chromecast), you may already realize that you can connect your phone or computer to your TV through these services in order to watch streaming video or show photos.  Being able to show the content from your screen becomes even more useful when the teacher can allow the students to show their screen on the Smartboard in a 1:1 environment.  This is now possible and extremely user-friendly with the Google Cast for Education extension.

To get started, you will use the Google Cast for Education extension with your laptop or chromebook, so add it here.  Once you add it, click on its green icon in your chrome browser at the top right-hand corner to open it.


When it opens, it will look like this:


It will ask you to name it, so I recommend giving it something that is simple for students to type in, such as your building and room number.  For example - MS101.  Notice that in the bottom left-hand corner, I named mine C&I.

Then it will ask you to share with certain people.  You can share with individuals, groups, or Google Classrooms.  That will allow you to instantly give permission to multiple students / users.

Once a student wants to cast to your window, they will use the same extension (Greg says he will add it for them), and then click the 3 dots (the kebab menu!) and choose "Cast" and a list will appear.


When the window pops up to "Cast to," they can type the name that you used, such as MS101 that I mentioned above.  Then it should come up for them to select.

Once a student is casting on your screen, it will look like the image below.


Notice that the person who is casting to your device is listed in the bottom center.  You can close them out by hitting the X at the top center.

If you want to see a video about how to use this, watch one here.

Many of us have experienced changing devices connected to a projector and the technical difficulties that can arise as a result.  This cast system can eliminate some of that heartache and create greater opportunities for students to share their work with the class in a 1:1 environment.  Test it out!


Tuesday, October 23, 2018

Choose Your Own Adventure

When students create their own Google Slides to demonstrate their learning, they are taking ownership over what they know and can do.  Allowing students to share some creativity will also enhance their connection to the content.  One way to do this is by having them create a Choose Your Own Adventure story in Google Slides.

When you create and share Google Slides, you can link certain slides to another slide.  That makes it possible to create a slideshow that will jump around in a specific order of your choosing.  See the example below.


When you are on a certain slide, that URL is unique and will link to that slide. Many students and teachers have used this to make interactive stories in Google slides based on other topics they have studied. See the examples below from around the web.

Treasure Hunt
The Secret Village
Butterfly Friends

Here are some other helpful resources for a project like this.

Planning Template
StoryboardThat

Wednesday, October 3, 2018

Cornell Notes

Notetaking continues to be an effective way to transfer knowledge to long term storage in the brain, and also offers a means for faster recall of information.  With the inclusion of technology in the classroom, it remains to be seen what impact typing vs. writing might have on this phenomenon.  Regardless, notetaking is an important skill that can be done in variety of ways, but Cornell Notes is an effective means for both traditional and digital means.

Cornell Notes was developed by Dr. Walter Pauk at Cornell University.  This focused means of taking notes allows for greater retention.  There are ten steps to the Cornell Way:

1. Create Format
2. Organize Notes
3. Review and Revise
4. Note Key Ideas
5. Exchange Ideas
6. Link Learning
7. Learning Tool
8. Written Feedback
9. Address
10. Your Reflection

You can read more about this method here or watch a video about it here.

A printable version of this format can be found here.
A digital version for use in Google Drive can be found here.

Reflection and returning to these notes is an important piece of retention.  It is important to scaffold instruction to return to the information and allow students to interact and reflect on their notes.

Wednesday, April 25, 2018

Best Add-Ons for Google Forms

Many of us are using Google Forms to create quizzes, send surveys, gather input, and collect data. With the use of add-ons, you can extend the use of forms and make it work harder for you. Here are some useful add-ons and how you might use them.

QR Code Maker - Do you want your students to fill out a form but you don’t have a quick way to send them the link? You can use QR code maker to have it create a link to the form that they can scan with an iPad or chromebook and it will open the form directly on the page. You could use this to hang the survey in a location for parents or students, put it on an assignment page or parent information sheet that is sent home to gather contact info, or put it on your website.

Form Limiter - This add-on allows you to turn off a form from accepting responses. You can choose the condition that stops it from collecting responses to be after a certain date or after it has received so many submissions. It can be used to accept data until a week after the initial request for example, or when the first 10 spots are taken.

Choice Eliminator - if you have a form with multiple choice, checkbox, or list question, this option will eliminate that as an option once someone else selects it. For example, you have a list of possible project topics that students A, B and C need to choose. If students A and B choose their topics, student C will only see the remaining options and be able to choose from those. Other ways to use this are to choose meeting dates and times, tasks for completion, or sign-ups for events.

With these add-ons, Google forms can be used beyond just giving a survey. If you need help getting started or troubleshooting an issue, please reach out!


Wednesday, April 4, 2018

Wednesday, March 7, 2018

Digital Citizenship


This June, it will be 11 years since the iPhone was first released. The first iPod was released almost 17 years ago. That means our seniors have probably never bought a CD, nevermind made a mix tape with recordings from the radio.

With great technology comes great responsibility. While we encourage the use of technology in our classes in order to create greater access and possibilities for our students, it also means that we need to inform them about what constitutes being a good digital citizen. This has become more relevant than ever with the institution of the 1:1 program at the middle and high school. So with that in mind, here are some resources for teachers and students. This will serve to begin a conversation about how to improve 1:1 instruction and integrate this as a topic of our everyday interaction with students.

My favorite resource for Digital Citizenship resources is Common Sense Media, which is also great for parents and I first learned about from Chris Long (thanks, Chris!). As part of the 5th grade specials rotation, I would use a number of resources on this website to expose kids to these topics in an engaging way. Here is a rundown of the best resources for each level.

For teachers
https://www.commonsense.org/education/training - This training is for any level teacher and is different depending on the one you choose. If you choose to participate, you will receive a certificate and you can turn it in to receive 1 hour of Act 48 credit. I did the one for high school and found it to be really engaging and helpful.
https://www.commonsense.org/education/posters - These posters are free to print and display in classrooms.
https://www.commonsense.org/education/recognition-educators - Receive a digital badge to showcase your skills as a Common Sense Educator.
https://edutrainingcenter.withgoogle.com/digital_citizenship/course?reset=QE9BL64Q - Complete this training with Google to touch on the most important topics related to Digital Citizenship and Safety.

For elementary
https://www.commonsense.org/education/digital-passport - This is for grades 3-5 and has several modules on digital citizenship and internet safety in game format.
https://beinternetawesome.withgoogle.com/en/resources - From Google, could be high elementary or middle.
https://assessments.commonsensemedia.org/ - Use these questions to gauge a student’s mastery of digital citizenship concepts. When they finish the 20 question assessment, they will receive a percentage grade and a certificate.

For middle school
https://www.commonsense.org/education/digital-compass - This game is case studies in decision making online, but presents kids with options and choose their own adventure. It talks to them about the reasons for choosing the correct answers and the consequences of poor decisions.
https://beinternetawesome.withgoogle.com/en/resources - From Google, could be high elementary or middle.
https://assessments.commonsensemedia.org/ - Use these questions to gauge a student’s mastery of digital citizenship concepts. When they finish the 20 question assessment, they will receive a percentage grade and a certificate.

For high school
https://www.commonsense.org/education/digital-bytes - This is designed for high school students and has them hear from other teens, but then actually has them create a project to voice their thoughts on the topic of digital citizenship.
https://assessments.commonsensemedia.org/ - Use these questions to gauge a student’s mastery of digital citizenship concepts. When they finish the 20 question assessment, they will receive a percentage grade and a certificate.

Please reach out if you have questions or comment. We will continue this discussion in the future at all levels.

Wednesday, January 17, 2018

Everfi

The best type of educational technology is robust, flexible and FREE. Those terms are not normally used together. Fortunately, it appears like Everfi might fit this mold. Since they are funded by outside resources, they are free to us!

Everfi has a database of educational and interactive resources to teach concepts from financial literacy to college and career readiness to STEM. Each one has a grade span that it works best for, so it’s definitely worth considering.


One of the weaknesses of Everfi right now is that they do not have single sign-on. That’s a big deal to me because when a website has that, we know Google is not sharing the child’s name with them, but instead sharing a “code” with which to recognize them. Being a little concerned about CIPA and COPPA compliance, I decided to check into it more. It turns out that many schools in our area are already using this for some of their courses, such as financial literacy in the high school.

Students would have to go to everfi.com/register and make an account, so this should really ONLY be used with students 13 or over UNLESS you are going to get permission from their parents to create an account for them. Please also note that Warrior Run student accounts cannot receive outside emails. A teacher can add students from the teacher dashboard, but the same rules would apply for privacy compliance.


Once a student has successfully completed one of the courses, you can print a certificate for them.


Here is an example video overview for the “Ignition” course on Digital Literacy and Responsibility.

Everfi may be free, robust and flexible, but there will be an initial setup for the teacher, and it’s not ideal for every grade level. If you teach one of the topics listed in their K-12 resources and are looking for something that students can work through independently that is also engaging, I recommend you give it a try.

Thursday, November 9, 2017

Flipgrid for giving every student a voice

While graphic organizers, exit tickets, and worksheets are a standard in every classroom, it is not the only way to get input from kids.  Google Classroom, Kahoot, Quizizz, and other tech tools can collect discussion answers, documents, or quick answers from students.  A tool I recently learned about, Flipgrid, is set up to accept picture, text or video responses to a prompt.  Students can see and comment on the posts of others as well.  Here’s how it might work:


  1. Teacher creates a “grid” related to a specific subject or grade level such as social studies, 3rd grade, or HS art.
  2. Teacher creates a topic related to their grid subject, such as volcanoes, narratives, or solving two step equations.  This should ask a question or require input from students.  For example, it could be, “Tell me a story using time order words,” or “How do you solve this equation?”
  3. Teacher shares the topic to the students and students give their input as a picture, text, and/or video.  That way they can talk through their learning, speaking out loud about how to complete a task, or they can show and talk about their results.
  4. Students can view and comment on their classmates’ submissions using emojis similar to Facebook.


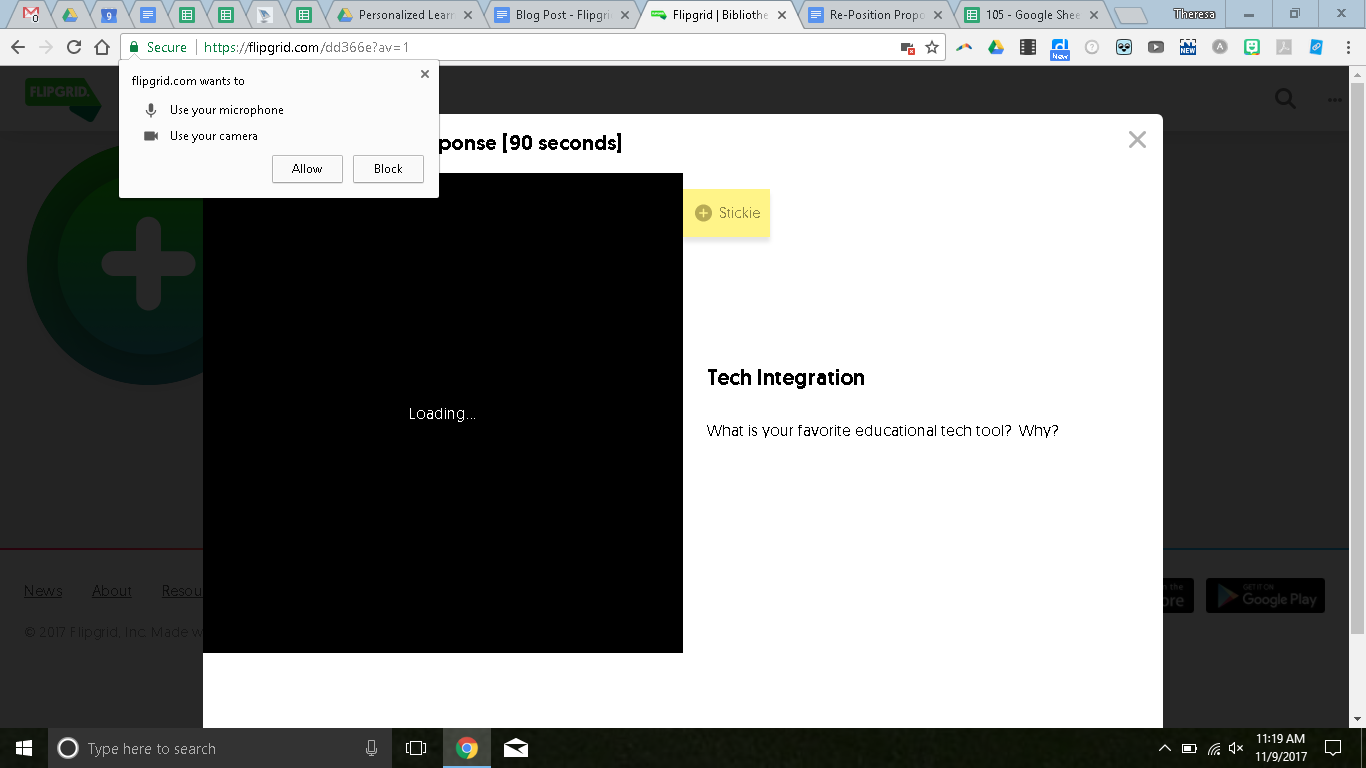
There is an iPad app, but you can also record from the chromebook.  When you click the + to add a response, it will prompt you to use your camera and microphone.


Once they allow these, then students will click the camera to record.


It will prompt the students to give their names and emails.  I would recommend you just have them put their first name and last initial.  Or just initials.  Once they post, they can view the posts from others.


You can contribute to my example here.

This could be a great first step to making great digital citizens who know how to use the tech resources for their learning.  If you have questions or need help, let me know and I’d be happy to stop by!

Monday, November 6, 2017

Focus

As a parent of two who recently put passcodes on her children’s iPads, I am aware of the pull that technology offers to children.  As a person who has tried to put most of the content I need on a day-to-day basis on my phone so it’s always accessible, I understand how for some of us the device has become a constant distraction.


With that in mind, I offer some ways to gain, keep, or re-focus, whether you are trying to do this with your students or for yourself. This means using a device AND staying on task!


For students, secondary teachers can make use of Hapara to focus a student’s browsing by only allowing them to visit certain sites for a determined period of time.  Teachers using iPads can turn on guided access to limit the areas on the screen with which students can interact.  Having your students use their computers with their backs to you (and their screens facing you) can also help to make sure they are on task.  Ultimately, though, it’s acceptable and healthy to put away the devices and have a face-to-face conversation.


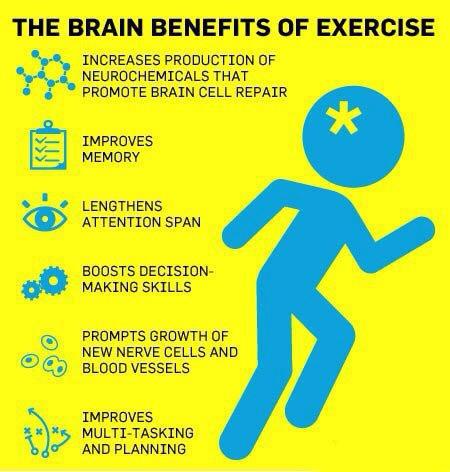
For teachers, there are several apps that will remind you to take a brain break: StandApp, Stand Up!, and Move It.  If you and your students are spending all period sitting at your desk, working on research, a presentation, or otherwise focusing on a task, it will be beneficial to you to get up and move, even if only for a stretch.  A Stanford study finds that walking is good for creativity, so it may be a good idea to work this into the lesson.  


Another aspect related to this are desk styles.  We have traditional table and chair, but now there are standing desks, fidget bands, yoga balls, node chairs, and the list goes on.  As someone who works with Greg, I can definitely see how these might be helpful!  :)

Wednesday, September 13, 2017

Saving class time with typing shortcuts

One gripe that I have heard a lot about students in the past five years is the lack of typing skills and the way that this interrupts instructional time.  While our district has taken steps to add to the time focusing on building these skills, there’s still only 24 hours in a day, so I thought I might share some ways that you can limit the typing for students or allow them to work on these skills during free time.


  1. Use the shelf on the chromebooks or create webpage icons on the iPads.
  2. Bookmark pages that students will visit frequently.
  3. Use a URL shortener like goo.gl or tinyurl.com.
  4. Share to them in Hapara/Drive/Email and tell them where to find the link.
  5. Also in Hapara, push out a link to all students.
  6. Create a Symbaloo page for your class with all the links you need.  Students can have a shortcut to that, and then just click the tool they will use that day.
  7. Use QR codes to login (Greg is working on this for Elementary).
  8. In Chrome, use the App Launcher.
  9. In iOS, Air Drop to your students.
  10. Allow students to use one of varying typing skills websites, such as typing.com or nitrotype.com, if they finish their work early.

If you have questions or need help with these items, please let me or one of your building tech helpers know.  We will always be glad to help.  Together, we will make 21st century learners that know where to find the W on the keyboard.

Image result for typing funny

Thursday, August 31, 2017

Chromebook tips and tricks

As we roll out a device to (almost) every student in our district, I thought these few bits of information might be helpful to teachers.


  1. In place of the function keys at the top of the keyboard, there are a number of icon keys which serve some of the same purposes.  Here’s what they do:
Image result for chromebook top keys shortcuts


2. The black bar at the bottom of the screen is called the shelf, and you can “pin” pages there that you want kids to be able to open quickly.  This is especially helpful as an initial setup for our slowest typers. Then it can act like a bookmark for the future.
To do so, just two finger tap the icon of the app/website and say, “Pin to shelf”; if it’s a website, when you have it open, click the three dots in the top right-hand corner and select, “Pin to shelf.”


3. To scroll on a chromebook, use two fingers on the touchpad to push up or pull down.  Hint: this also works on your laptops, teachers.  To right click, tap two fingers on the touchpad.


4. For classroom management purposes, chromebooks can be a distraction.  When entering the classroom, you can use signals to let students know expectations.  For example, use a stoplight to indicate how you will start class.  Red means no device needed, so put it under your seat.  Yellow means not yet.  Green means get ready to go!  Another favorite is “Lids at 45” so that eyes can be on you.  I’m in favor of closing lids to get their full attention, but sometimes goofy things happen when opening them again, so lids at 45 at least removes it from their line of vision.


Chromebooks have lots more fun tips that our students may know more than us.  Don’t be afraid to explore or ask for help!